enjoying a life of random hobbies on a farm in the middle of nowhere
2016-2017 Lower Pond version 5
This will be our first above ground, rectangular, concrete pond. While there wasn’t a need to re-do the lower pond, the pond digger was itching to have another pond project and I didn’t want a third pond right now. Of course creating a new pond also means we’ll be doing some major landscaping projects. Should keep us busy in 2017.
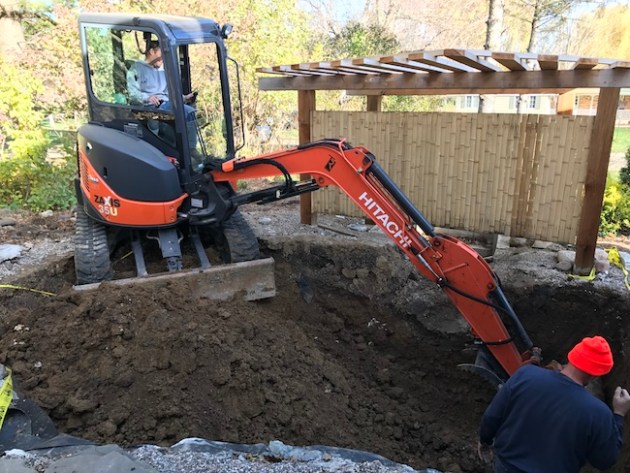
The lower pond in 2016. We added a shade structure since this area gets a lot of sun. The pond supports a waterfall that loops back into the pond.Planning starts as we close down the pond in October. We asked our friend Matt Sklar, Kenzen Koi Food manufacturer, to help design the pond. I asked for a pond that has a little less turbulence on the surface.11.16.2016 Tom Royer, TR Services, Bloomington, MN comes out to dig our hole. Now you might be wondering why we are doing this in November in Minnesota? Spring comes late and there are lots of lucrative projects stacked up waiting for road restrictions to lift. Small projects like this need to be squeezed in and we had an unusually warm fall.11.20.2016 Winter Storm Argos passed through with some rain and snow. Nice little mud hole 🙁11.21.2016 Almost freezing temps outside but the pond digger is out leveling the dirt pile, draining the pond and digging in where the bottom drains will be placed.11.20.2016 working indoors in preparation for concrete pouring tomorrow. It’s so cold in MN that we stretch the flex hose in our gym to keep it pliable. The third bay becomes quite messy with stuff.Two x Dream Pond – koitoilet aerated bottom drainTangential Pond Returns (TPRs) that we sourced through Kent Wallace, Living Water Solutions.11.20.2016 Gotta love my pond digger. It’s 5:35 pm, dark, 28 degrees and he’s still busy placing the bottom drains for the concrete pour tomorrow. I’m a pretty lucky koi keeper 🙂11.21.2016 We’re on a little weather hold. We have rain and snow in the forecast for the next two days so the concrete guys are going to play it by ear. We might have the forms going in on Wednesday if the weather allows and then concrete can be pumped in on Friday…maybe Saturday. Since we need a space around the walls, the actual inner pond dimensions will be more like 9 x 15 x 6. We think this will be sufficient for our needs.A little weather delay…we’ve covered the hole with tarps and are hoping the snow and rain are light.11.25.2016 we’ve been on a weather hold but the first part of the concrete pour was squeezed in on Black Friday.
11.25.2016 The next step is building the foam walls and pouring the concrete. We’ll have a truck that pumps the concrete to the pond site to reduce yard damage and fit into the small space. THe pond digger wishes the bottom drains were a little more symmetrical in placement but this is close enough.
11.26.2016 Wall building started this afternoon and ended early in the evening.
11.27.2016 getting into the 6 feet deep hole was a little challenging but the pond digger managed. Today, he covered the TPRs and air over with wood and reshaped the bottom of the pond. He also placed the skimmer into the future wall. Now we will need to wait out some more rain and snow until the second concrete pour is scheduled.
Here’s a few lessons learned:
1. Dig the hole 3-4′ wider than the final pond dimensions.
2. Take into account inner versus outer dimensions of the final pond.
3. Digging in an area without landscaping in place is helpful.
4. Getting in and out of the hole requires ladders and some balance, plan accordingly.
5. Large tarps and some lumber to protect the build site will ensure you are not creating a mud pit.
6. Contract out as much work as possible.
7. Having a helper is a good idea.
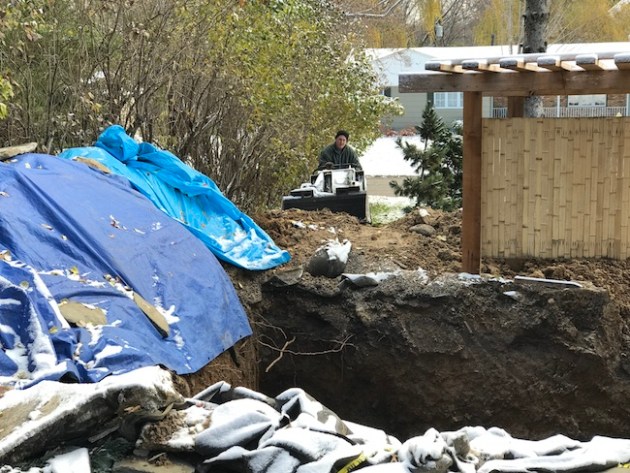
12.1.2016 Part 2 of the concrete pour happened today. The insulated concrete form block structure was braced and concrete was pumped in from trucks parked on the street. A team of two guys worked their way around the structure a few times. Concrete is at 80% strength in about 3 days and it will continue to cure over the winter months.
Spring finally arrives and work on the upper pond is complete – time to get the lower pond going!
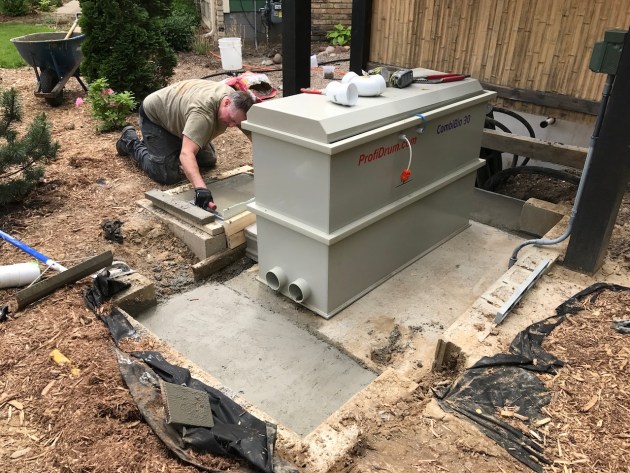
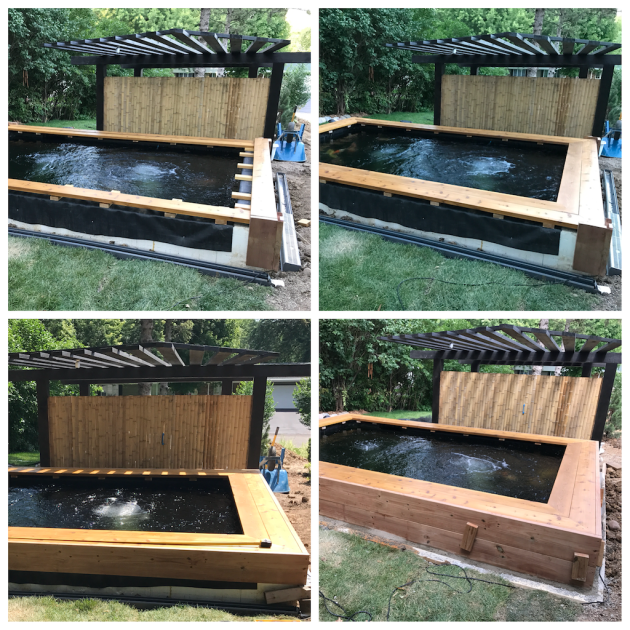
first coat of slate stain on the lower pond shade featurestaining is complete – time to move the top piece forwardMay 27 – Dropping the custom liner in should have been a 5 man job. Good thing our friend Sai Her is like three men in one. Concrete blocks served as extra hands to hold the line as we tried to straighten it out.May 28 – the pond builder really likes to play with concrete. He extended the concrete areas of the equipment pad for a neater look.May 29 – connecting the bottom drains and skimmer to the RDF. Very large ball valves and some clear PVC piping segments to see what’s going on.Jun 2 – the bottom drains have been installed and we’ll fill the pond a little to help pull out the wrinkles.June 9 – The pond builder did a nice job making the lower pond presentable, albeit unfinished, for Takahiro Omosako’s visitJune 17 – The area can get pretty muddy so we leveled the dirt and put down some sod. Next year this might be a dining deck area.July 4 – We decided on stained cedar for the top and yakisugi (charred wood) on the side. The yakisugi would take about 8 weeks so we put up pressured treated wood temporarily and stained it black. The effect was nice enough that I will most likely not order the yakisugi 🙂July 8 – Stained sides and a little auto feederJuly 29 – work area is staked out…July 31 – The pond needs a little decking around the edges and the landscaping needs some help. We have some koi kichi guests coming over on Friday so we went for two sides of pressure treated wooden decking. It will need to be stained as well.


You must be logged in to post a comment.